(Originally published 7/12/2011; revised for clarity and technical depth)

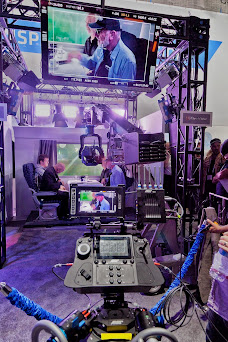
The immediate gratification enabled by digital image evaluation and playback—via built-in monitors and HDMI/SDI outputs connected to high-resolution displays—was transformative. These systems introduced real-time tools like histograms, luminance meters, zebras, peaking, false color, waveform monitors, vectorscopes, LUTs, overlays, and more. Consequently, handheld incident and reflected light metering began to feel obsolete to a new wave of digital cinematographers and still photographers—many of whom had never shot on film, nor used a traditional light meter.
Evaluating exposure by eye—on a high-definition monitor—became the new norm, embraced not just by DPs but the entire crew, now with instant access to image quality and lighting decisions.
Back in the heyday of the Canon 5D Mark II (which democratized digital cinematography), as well as cameras like the Panasonic DVX-100, the AJ-HDC27 VariCam, and the Sony HDW-F900 CineAlta, I began asking fellow professionals whether they still used light meters—or relied entirely on monitors and histograms.
The responses were telling. One DP said, “I’m not using it—monitors are faster and more convenient. Our Marshall monitors do the job.” Another, more bluntly, told me: “I’ve never used one.”

Yet here we are, years later, and light meters—along with their color meter cousins—are once again finding their place in the hands of cinematographers and commercial photographers. With today’s advanced monitoring and image evaluation tools, light meters have become a complementary asset, not an obsolete relic.
So, let’s shed some “light” on the use and legacy of this indispensable tool—and why understanding it matters for your next motion picture or still photo shoot.
Acknowledging the Masters
Before diving deeper, we must recognize the contributions of Karl Freund, ASC, whose innovations helped elevate the light meter into an essential tool for motion picture production. Thank you, Karl!

A light meter is a device used to measure the amount of light in a scene. In both still photography and cinematography, light meters are traditionally used to determine proper exposure. These tools—whether analog or digital—compute the correct relationship between ISO, shutter speed, and aperture (f-stop or T-stop) based on a given lighting condition, film sensitivity, or sensor sensitivity.
The focus of this article is on handheld light meters—though light measurement also plays a crucial role in other disciplines, such as theatrical lighting design, architectural illumination, and scenic planning.

In those contexts—be it a theater production, a fashion shoot, or a cinematographer lighting a noir sequence—specialized meters are used to provide actionable readings. Manufacturers have responded with hand held meters designed for specific industries, offering various readouts: footcandles, candelas, lux, or lumens.

In order to accomplish the correct measurements needed by a lighting designer working on a theater scene or a concert, or by a photographer on a fashion shoot or by a cinematographer recreating a Noir genre scene, the leading lighting metering manufacturers have designed specialized lighting measuring devices applicable to the different fields of work.
Today there are many types of light meters used in the general field of consumer and industrial lighting. Some of the light meters are made to read measured lighting levels in different values (footcandles/candelas/lumens), but all provide the proper exposure (F stop) or the proper illumination read-out (footcandles or lumens) by manufacturer's specifications on falling or reflecting light (incident/ reflected) into a surface whether the surface is an animated or inanimate object.

A footcandle is defined as the illuminance cast on a surface by a one-candela source positioned one foot away. In other terms, it is the amount of light falling on a one-square-foot area illuminated by one lumen. One footcandle equals 10.764 lux.
The footcandle—like the British Thermal Unit (BTU)—is a non-SI unit still commonly used in the United States, especially in construction engineering and building codes. Since footcandles and lux measure the same quantity (illuminance), they can be converted easily. For practical purposes, it’s often sufficient to approximate 1 footcandle ≈ 10 lux, as even professional lighting measurements rarely need more than ±10% accuracy in ambient scenarios.

A PRACTICAL DEMONSTRATION USING ASA 100
If you’re using a 35mm camera with manual exposure settings and a built-in light meter, you can derive an approximate footcandle measurement with a simple test:
-Place a large white card or sheet of white paper on the subject at a 45° angle to the camera.
-Set the ASA to 100 and the shutter speed to 1/15 second.
-Based on the f-stop reading from the in-camera meter, refer to the following table:
|
f-stop |
Approx. Footcandles |
|
f/4 |
10 fc |
|
f/5.6 |
20 fc |
|
f/8 |
40 fc |
|
f/11 |
80 fc |
|
f/16 |
160 fc |
|
f/19 |
240 fc (between f/16 and f/22) |
How Light Meters Work
The type of meter you use determines not only how it measures light but also how you should use it. There are two basic kinds of light meters: reflected-light meters, which measure light reflected from a scene, and incident-light meters, which measure the light falling onto the scene.
Each type has advantages and disadvantages. Some handheld meters come with accessories that enable both reflected and incident readings. Among reflected-light meters, those that read a wide angle of view are called averaging meters—they make up the majority of meters, especially those built into cameras. Another subtype, the spot meter, is designed to take readings from a very narrow portion of the scene—typically one degree of the field of view.

The first step in achieving accurate exposure is to match your handheld light meter’s ISO/ASA setting with your camera sensor’s ISO setting. ISO (formerly ASA) indicates a film or sensor’s sensitivity to light. The higher the ISO number, the more sensitive (or “faster”) the sensor; the lower the number, the less sensitive (“slower”).
Common ISO values include: 100, 200, 400, 800, 1600, 3200, 6400.
Tip: Each step up doubles the sensitivity to light; each step down halves it.

This highlights the technical importance of proper lighting—the cleaner the exposure, the more latitude you retain in post-production.
Virtually all in-camera meters are reflected-light types, averaging the brightness within the field of view of the lens. When you look through an SLR or DSLR viewfinder, you see what the meter sees. Changing lenses can alter the metered area.
Most handheld meters are also reflected-light meters. These are often preferred by photographers because they allow readings from the camera’s position. To take a reading, you stand at the camera and aim the meter at the subject.
In contrast, to use an incident-light meter, you place it near the subject in the same light, pointing it back toward the camera. This reads the light falling on the subject, independent of reflectance—especially useful for portraits and cinematography.

Why bother with a handheld light meter when your DSLR or digital cine camera offers histograms, exposure peaking, false color displays, and high-definition monitors?
1. Proper Exposure & Sensor Calibration
A handheld meter allows you to determine proper exposure in an objective, repeatable way. Start by calibrating your camera’s sensor using an 18% gray card (or ANSI 12% gray). Match your camera’s ISO/shutter/f-stop with your meter’s settings. In multi-camera environments, use a color/pattern chart like DSC Labs AmbiCombi to align exposures and colorimetry across systems.
Shoot the gray card at the metered value and in 1/3-stop increments. Use spot or center-weighted metering. Review the histogram in-camera (not in post), and select the exposure where the gray card appears centered. This becomes your reference.
.


In still photography, proper exposure can be locked in. In motion photography, consistency across takes and lighting setups becomes paramount. Commercial stills often demand precise exposure for aesthetic and printing reasons (e.g., four- and two-color offset printing using Macbeth or X-Rite calibration).
In cinematography, light meters are crucial for maintaining consistent lighting ratios and exposure values. Monitors may suggest aesthetic balance, but only a light meter can deliver objective measurements in foot-candles, f/stops, or T-stops.
Think of the light meter as the cinematographer’s brush. Just as a painter adjusts intensity and hue, a DP uses a meter to sculpt light—its shape, intensity, and emotional tone.

What a Light Meter “Sees”
Both incident and reflected meters are calibrated to “see” the world as medium gray—typically 18% reflectance. This assumes a balanced distribution of light and dark in a scene.
There are three types of exposure meters: Incident - Ambient/Flash, Reflected - Spotmeter, one degree and Color Temperature meter.
1. Incident-Light Meters
Invented by Don Norwood and refined by Karl Freund, ASC, the incident meter measures light falling onto a subject using a hemispherical diffuser (or photosphere). It gained popularity in cinema, where consistent skin tones and scene-to-scene exposure mattered more than background brightness.
Unlike in-camera meters, which can be fooled by reflectance or high-contrast scenes, the incident meter offers reliable, repeatable readings—ideal for fast-paced productions and controlled lighting environments.

The one-degree spot meter is invaluable for distance readings. Whether you’re metering a subject on stage, at a press conference, or in wildlife photography, the spot meter lets you isolate and prioritize specific tonal areas—especially when the scene’s average brightness is misleading.
3. Color Temperature Meters
These meters measure the color temperature (in Kelvin) of light sources, guiding your use of corrective filters—be it warming gels, color compensation (CC) filters, or light-balancing filters. The best models use three-channel sensors for precise cine and still photography calibration.

Early Devices: Actinometers & Extinction Meters
• Actinometers: Used photo-sensitive paper that darkened to a standard tone over time.
• Extinction meters: Depended on the human eye; you’d view a graduated pattern or scale and match visibility to determine exposure.
Selenium & CdS Meters
• Selenium Cells (1930s–1950s): Generated a small current from light. These required no batteries but struggled in low light and were fragile due to their reliance on microammeters.
• CdS (Cadmium Sulfide) Sensors (1950s onward): More sensitive, rugged, and powered by internal batteries. High-resistance in darkness allowed for simple on-off mechanisms. Devices like the Gossen Luna-Pro and Minolta Autometer used this system, often incorporating a 10-stop neutral density filter for high-light environments.
The Norwood Revolution
In the mid-1930s, Captain Don Norwood invented the photosphere, enabling accurate incident metering via the “Incident Hemisphere Principle.” Cinematographer Karl Freund (of I Love Lucy fame) secured manufacturing rights and began building meters under the Spectra brand.
• 1947: Spectra Classic
• 1948: Norwood Director, marketed by American Bolex
When Norwood’s patent expired in 1960, manufacturers in Germany and Japan began producing similar meters, leading to innovations like the Weston Invercone, which became a benchmark in incident metering.

Another type of early meter, the extinction meter, depended on eyesight: the user looks through the meter at a row of numbers, each behind a celluloid window of different opacity, the highest or lowest visible number determining which light situation is given. Other extinction meters have a pattern visible through the eyepiece, and a control varies the amount of light allowed into the device until the pattern can only just be seen; the position on the control then indicates the exposure.

The first electrical ones used a selenium photovoltaic cell. This cell generated a minute electrical current that varied with the amount of light striking it. This tiny current required a micro ammeter to measure it. This led to one of the two major drawbacks of this type of meter - micro ammeters are extremely delicate. The other problem was that the combination of photo cell and micro ammeter had little sensitivity to low light. Of course the films back then were relatively slow any way. The advantage of this metering system is that it does not require batteries.


In the mid-1930's, Captain Don Norwood invented the photosphere - a key part of the incident type exposure meter. It is through the photosphere that incident light is measured accurately, using what is called the Incident Hemisphere Principal. In the early 1940's, Karl Freund, the Cinematographer on the Lucy Show, founded Photo Research -the former parent Company of Spectra Cine, Inc. Karl secured manufacturing rights for light meters utilizing the photosphere principle from Don Norwood.
Mr. Freund started manufacturing exposure meters under the U.S. registered Trademark name of "SPECTRA" in 1947. The name of the Meter was Spectra Classic. (Nowadays sold as the Spectra Combi). About 1 year later the model was redesigned and became the oval shaped Norwood Director. (1948). It was marketed by the American Bolex Company.


These three videos below are a few years old but are excellent explaining how to use a light meter for cinematography. The first one, is about the Sekonic L- 585D for cinematography. The second video is Film School with Mark Vargo, ASC: A Tale of Two Meters. And the last one, is a comprehensive ode to Grips on set, Film School with Mark Vargo, ASC: Grip it Good.
Enjoy and learn!
 |
| Sekonic L- 585D for cinematography |
 |
| Mark Vargo, ASC: A Tale of Two Meters |
 |
| Mark Vargo, ASC: Grip it Good |
Final Thoughts
Today, light meters remain essential tools—not relics—for photographers and cinematographers committed to exposure accuracy and lighting precision. Whether used to calibrate, monitor, or guide the lighting narrative of a scene, the light meter stands not just as a technical device but as an artistic companion in the quest for visual excellence.