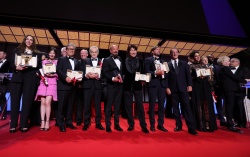
by George Leon
This is a republished article (7/12/2011), from those early days witnessing the frenetic pace of technological advances in digital cinematography with the advent of game changing full frame and APS-C DSRL video cameras and 2K/4K Super 35 and full frame digital cinema cameras.
The impact of insta gratification and immediate image evaluation provided by the new digital cinematography technology in those cameras featuring capturing screens and HDMI/SDI connectors to high resolution playback monitors, integrated with Histograms, Luminance, Zebra, Peaking, False Color, Waveform, Vectorscope, LUTS storage, Overlays and more, made the hand held incident and reflected metering of light, an obsolete practice to a new wave of digital cinematographers and digital still photographers that probably never shot on film in the past and never used a lightmeter, giving an enormous popularity to evaluating ligthing levels on a high definition monitor, not only by the DP, but now accesible to the whole crew as well.
During those days, I inquired to some people, about the use of a lightmeter for metering versus evaluating by monitor and histogram levels.
After my inquiry about it, I was told at least couple times - "I'm not using it due to convenience, it is faster, our Marshall monitors will do" and on other shoot, I was told bluntly by the D.P, "I have never used one".
Today, all cinematographers and commercial photographers are once again more adept to use a lightmeter or a color meter to measure light levels or color temperature for capturing images, complimenting the monitor evaluation.
So, lets shed some "light" into the use and history of this tool to help you to understand the importance of a light meter, in your next footage or still image capture.
Douglas Slocombe OBE, BSC, ASC reading the lighting set up of a take.
John Toll, ASC reading the lighting set up
of a scene
FIRST NOTION. ABC OF PHOTOGRAPHY.
A light meter is a device used to measure the amount of light. In still photography and cinematography, a light meter is often used to determine the proper exposure for a photograph or footage. Typically a light meter will include a computer, either digital or analog, which allows the photographer or cinematographer to determine which ISO, shutter speed, F stop or T stop should be selected for an optimum exposure, given to a certain lighting situation, film speed or digital sensor sensitivity.
Karl Freund, ASC taking a reading on his award winning film "The Good Earth".
The light meters we are referring on this article are all hand-held light meters. Light meters are also used in the fields of scenic design and architectural lighting design to determine the optimum light levels for a scene or the amount of light or optimum illumination falling into or reflecting from the facade or any specific part of a building or architectural structure.
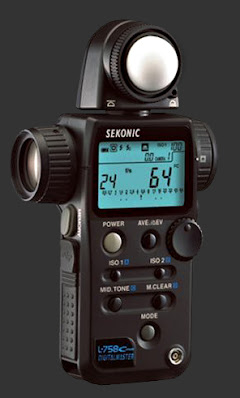
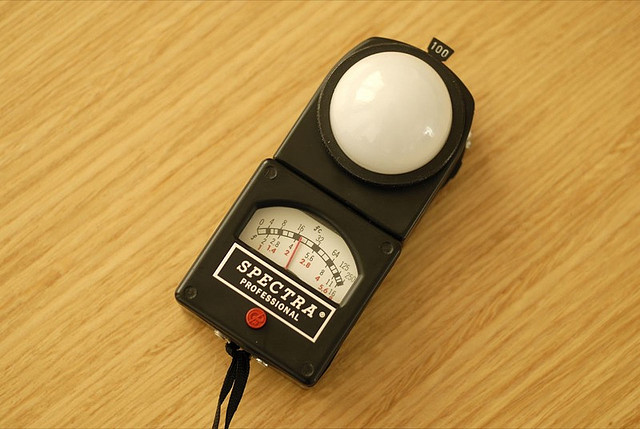
The Spectra® Professional® IV-A is an advanced digital exposure meter for
motion picture film and digital cinematography.
The IV-A has received a Technical Academy Award, an Engineering Emmy and numerous other international awards.
In order to accomplish the correct measurements needed by a lighting designer working on a theater scene or a concert, or by a photographer on a fashion shoot or by a cinematographer recreating a Noir genre scene, the leading lighting metering manufacturers have designed specialized lighting measuring devices applicable to the different fields of work. Today there are many types of light meters used in the general field of consumer and industrial lighting. Some of the light meters are made to read measured lighting levels in different values (footcandles/candelas/lumens), but all provide the proper exposure (F stop) or the proper illumination read-out (footcandles or lumens) by manufacturer's specifications on falling or reflecting light (incident/ reflected) into a surface whether the surface is an animated or inanimate object.
A foot candle. NOT! but you get the
idea as a gimmick presented decades
ago by G&E
Foot-candle refers to the "the illuminance cast on a surface by a one-candela source one foot away." Alternatively, it can be defined as the illuminance on a 1-square foot surface of which there is a uniformly distributed flux of one lumen. This can be thought of as the amount of light that actually falls on a given surface. The foot-candle is equal to one lumen per square foot. One footcandle 10.764 lux.
The footcandle (or lumen per square foot) is a non-SI unit of illuminance. Like the BTU, it is still in fairly common use in the United States, particularly in construction-related engineering and in building codes. Because lux and footcandles are different units of the same quantity, it is perfectly valid to convert footcandles to lux and vice versa. In practical applications, as when measuring room illumination, it is very difficult to measure illuminance more accurately than ±10%, and for many purposes it is quite sufficient to think of one footcandle as about ten lux.
Rodrigo Prieto, ASC AMC taking a reading
When you use the light meter built into a 35mm camera that has manually adjustable settings, you could determine the number of footcandles of light reaching your subject area, for example, prop a large sheet of white paper or white cardboard on the subject at a 45-degree angle. Set the camera’s ASA dial at 100 and the shutter speed at 1/15 of a second. The f-stop reading you get can then be translated into the approximate footcandle level, as listed below.
At ASA 100 and 1/15 second:
f4 = 10 footcandles
f5.6 = 20footcandles
f8 = 40 footcandles
f11 = 80 footcandles
f16 = 160 footcandles
f19= (between f16 and f22) = 240 footcandles
HOW LIGHT METERS WORK
The kind of meter you have determines not only how it measures light, but how you should use it. There are two basic kinds of meters: reflected-light (they measure the light reflecting from a scene) and incident-light (they measure the light falling onto a scene). Each type has its advantages and its disadvantages. Some meters have accessories that enable you to use them to read either reflected light or incident light. Reflected-light meters that read a wide angle of view are also called averaging meters. They account for most of the reflected-light meters in use, including those built into cameras. Another type of reflected-light meter, the spot meter, is designed to take readings from only a small part of the scene.
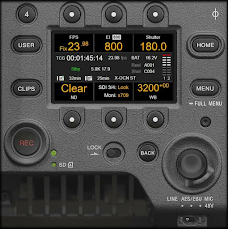
The Sekonic L-758Cine DigitalMaster
is the ultimate light measuring
tool for cinematographers,
videographers and digital still shooters.
FILM SPEED/ISO
The first step in getting good results is to match your hand held light meter ISO/ASA sensitivity reading with your DSRL camera sensor sensitivity ISO reading (film speed). The ISO or ASA speed is a number that indicates the relative sensitivity of the film to light or the relative sensitivity of the sensor to read light of a given scene. The higher the number, the more sensitive or "faster" the film or sensitivity to light of the sensor; the lower the number, the less sensitive or "slower" the film or sensitivity of the sensor . The most common ISOs are: 100, 200, 400, 800, 1600, 3200, 6400. Quick tip: The higher the ISO number = the higher the sensitivity to light. Moving from one ISO to the next value changes the exposure by half or double.
Roger Deakins, BSC, ASC
taking a light reading
The ability to shoot in low light (3200-6400 ISO) has a trade-off in the form of grain or noise. In digital cameras it's not the grain of the film that becomes visible at higher sensitivities, but digital noise - the visual equivalent to the hiss you hear when you turn a hi-fi amp up to full volume when nothing is playing. 100 ISO will give you sharp images while 3200 will show quite a lot of noise. The higher the ISO number = the more noise/grain. Hence, the technical importance of lighting properly your scene.
METER READING AREA
Virtually all in-camera meters are the reflected type--they measure the average brightness of the light within the lens' field of view. As you look through the lens of a 35 mm SLR or DSRL camera you can see what the meter sees. Change the lens and you change the area being metered in some instances. Most handheld meters are also reflected-light meters. Many photographers prefer reflected hand held light meters because they can use them to take light readings from the camera position. To take a light reading with a handheld reflected-light exposure meter, you usually stand at the camera position and aim the meter at your subject. To use an incident hand held light meter, on the other hand, you usually position the meter as near the subject as possible, in the same light that is illuminating the subject, and aim the meter back at the camera.
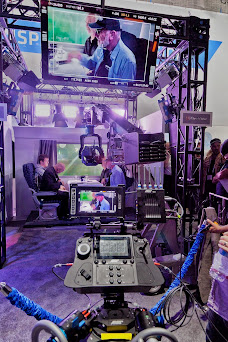
Terry Stacy, DoP on the set of the Extra Man
THE IMPORTANCE OF A LIGHT METER
Why is important to use a light meter as part of my regular tool set, if I have a camera display with histograms available for quick at a glance look on my DSRL or I own a pricey Hi def 1920x1080 monitor?
The first reason to use a hand held light meter by a cinematographer or still photographer is proper exposure of a scene. A easy way to obtain this proper exposure into with a new DSRL or digital cinematography camera is to do a camera sensor calibration (find ISO/shutter speed/Fstop) and match it to the metered reading of a cine capable hand held light meter (ISO/shutter/Fstop) onto a 18% gray scale chart/target (some stand for 12%ANSI values) and on a multi-camera situations use a gray/pattern color target such as a DSC Labs AmbiCombi or similar. (Then, set your picture styles and color settings on the DSRL's menu window)
.
18% gray and color chart used for calibration
Shoot the gray card under even lighting at the metered value, and at third-stop increments (use only spot or center weighted metering, and make sure the card is angled slightly towards the light). Look at the histograms for each exposure (on the camera, not in Photoshop, which uses a different method of generating histograms). If you're using a 18% gray card, pick the exposure setting that generates a centered value and set that in your exposure compensation control.
The second reason is consistency of the above mentioned proper exposure, it which is easily achieved on still photography, but a bit more complex to maintain during motion photography for obvious reasons. Commercial and advertising still photography requires a high degree of exactitude on proper exposures of every plate or frame given not only to aesthetic reasons but also due to the four and two color off-set printing process. (Using Macbeth calibration).
On cinematography proper exposure should be achieved consistent and easy to repeat on any set up. The fastest and accurate way to measure a lighting diagram on set or during the filming of a scene is using a hand held meter. A digital calibrated monitor on-set would give you a general aesthetic idea of the lighting ratios and may suggest the beauty of an scene, but not the exact values on footcandles, F stops or T stops of your lighting set-up illuminating your subject, object or scene. Thus the importance of a light meter on your belt set. Whether you shoot on film stock or digital, the light meter equals to the brush used by the painter, as when he or she decides to dab or stroke a bit more or less color and intensity onto the canvas.
The same notion applies when a light meter is used by a talented DP or cinematographer modeling the light on its form, shape, intensity and color to deliver a visual message. Narrative film making is usually heightened by outstanding narrative cinematography.
Advertising cinematography is by nature descriptive of the color standards provided by the manufacturer and agency creative directors, whether is a service or a product. Regardless, both forms of cinematography require to be precise on exposure. Not only by eye but by instrument.
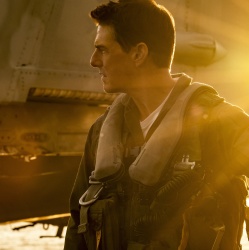
Wally Pfister, ASC doing a key light
reading on the set of Inception
WHAT A LIGHT METER SEES
Both reflected-light and incident-light meters are made to "see" the world as a medium gray. The assumption is that most subjects, most of the time, are of average tone and reflectance. So long as there is an even distribution of light and dark subjects in the scene, correct exposure is usually as easy as pointing the meter or camera at the scene and using the reading you get. But the real world does not always present subjects to you in such a straightforward way.
For example, with either a reflected-light meter or an incident-light meter, if the main subject is very dark or very light, the indicated exposure will make the subject appear as a medium tone in the picture. The result may be a incorrect exposure, unless you apply your own judgement and the compensate with on-board histogram read-outs to the information the meter gives you.
WHAT ALL THESE MEAN
Use a meter reading as a guideline rather than a dictate for correct exposure. This makes it important that you understand how your particular meter works so you can consistently get good results no matter what the lighting source could be. So, when you are using a light meter to evaluate the lighting of a scene, whether is on strobes, available light, tungsten, fluorescent, HMI's , xenons, LED's or mixed, you should calibrate it for compensation and test your exposures first, until you are acquainted to your light meter and its readings of your lighting schemes to store on your picture styles.
EXPOSURE METERS
There are primarily three types of exposure meters: incident type (ambient and/or flash), reflected (spotmeter, one degree) and color temperature.
1. INCIDENT TYPE EXPOSURE METERS
Initially developed by Don Norwood and later developed further by Karl Freund, ASC, the incident type exposure meter measures the intensity of the light falling (or incident) upon the subject. A hemispherical diffuser in front of the cell integrates the light falling from different directions. The incident meter recommends the correct exposure for an average, three-dimensional subject in that light. The incident meter first gained popularity in the movie industry. Movie makers needed a meter that would give a constant interpretation from scene to scene of the skin tone of the leading actors - regardless of background or the amount of back-light used on the sets. So many cameras have excellent built-in meters today that, for many photographers, the thought of owning another hand-held meter might seem odd. Nonetheless, built-in camera meters are generally the reflected-light type. As any professional photographer will tell you, there are many situations that can baffle and confuse even the most advanced reflected-light meters. In fact, there are many important lighting situations that are simply beyond the scope of any built-in meter.
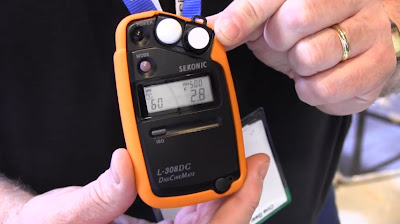
The Sekonic L-308DC light meter is a great tool for those DSLR shooters who have never used a light meter before
Today, the incident meter is popular with any photographer (still or cine) who has to work in a hurry without evaluating the effect of the relatively unimportant surroundings or misleading subject or background brightness on his exposure. The incident meter is highly important and practical meter.
2. SPOT METERS
The one degree spot-meter is the most popular reflected type meter. The one degree spot has the ability to reach out and confine its reading to important subjects at a distance from the camera. Whether it be a spotlight figure on the stage, the speaker at a news conference, or an animal at the zoo - often the only way to meter an unapproachable subject accurately, especially if the surroundings are misleading, is to use the spot-meter.
3. COLOR METERS
The color temperature meter is used to measure the precise color temperature of any light sources (quality of light sources). It then recommends the most appropriate correction filters (light balancing or color compensation filters) to balance the color with the film type set on the meter. The best meter to use for cine or still photography is the three color temperature meter.
A BRIEF HISTORY
Early light meters
Actinometers were the first light meters. They typically had the shape of a pocket watch and used light sensitive photo print paper as means of measuring. The time to darken a piece of such paper until it matches a standard tint is the input value for the scales on which an appropriate shutter-speed/aperture combination for the light situation can be found.
Logaphot extinction meter of 1955
with slide-rule back to determine
exposure settings for 100 ASA
Another type of early meter, the extinction meter, depended on eyesight: the user looks through the meter at a row of numbers, each behind a celluloid window of different opacity, the highest or lowest visible number determining which light situation is given. Other extinction meters have a pattern visible through the eyepiece, and a control varies the amount of light allowed into the device until the pattern can only just be seen; the position on the control then indicates the exposure.
Mimosa extinction meter of 1947
The first electrical ones used a selenium photovoltaic cell. This cell generated a minute electrical current that varied with the amount of light striking it. This tiny current required a micro ammeter to measure it. This led to one of the two major drawbacks of this type of meter - micro ammeters are extremely delicate. The other problem was that the combination of photo cell and micro ammeter had little sensitivity to low light. Of course the films back then were relatively slow any way. The advantage of this metering system is that it does not require batteries.
Bertram Chrostar Exposure Meter
The next generation of light meter used a cadmium sulfide (CdS) sensor. This is a device that changes resistance in proportion to the light striking it. This means a meter must contain a battery and can use a milli-ammeter instead of a micro ammeter. This is much more rugged and reliable. Since the resistance is extremely high in darkness some of the early meter just provided a light tight cover over the sensor to turn the meter off. I think public reaction to this method caused it to be replaced with a switch. Many hand held CdS meters were dual range devices. The base meter was a very sensitive device and a neutral density filter provided a high light level range. Both the Gossen Luna-Pro and the Minolta Autometer used this system. The neutral density filter was about 10 f-stops - this is the amount of filtering you need to safely view the sun in daylight. This provides a more accurate metering system than that used for full aperture metering. The sensor can operate over a narrower more linear range
.

The Norwood Exposure Meter Director
n the mid-1930's, Captain Don Norwood invented the photosphere - a key part of the incident type exposure meter. It is through the photosphere that incident light is measured accurately, using what is called the Incident Hemisphere Principal. In the early 1940's, Karl Freund, the Cinematographer on the Lucy Show, founded Photo Research -the former parent Company of Spectra Cine, Inc. Karl secured manufacturing rights for light meters utilizing the photosphere principle from Don Norwood. Mr. Freund started manufacturing exposure meters under the U.S. registered Trademark name of "SPECTRA" in 1947. The name of the Meter was Spectra Classic. (Nowadays sold as the Spectra Combi). About 1 year later the model was redesigned and became the oval shaped NorWood Director. (1948). It was marketed by the American Bolex Company.
Following the expiration of Captain Norwood's Patent in 1960, manufacturers from Japan and Germany began manufacturing exposure meters with this Incidence Hemisphere Principal. Kolmorgen, a public traded company on the New York Stock Exchange, purchased Photo Research in the mid-1960's. Hence, there was already the inverted Cone (Invercone) by Weston Master and considered as the ultimate solution.
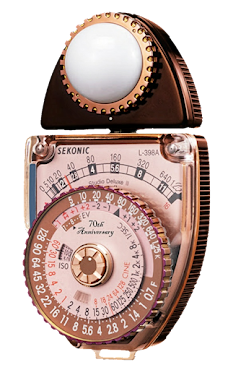
L-398A Studio Deluxe, 70th Anniversary.
The classic photo meter tracing its roots
to the famous Norwood Director.
The Sekonic L-398A has become
a favorite with cinematographers
the world over.